
Building a Cvent event from scratch takes hours. Copying last year’s event takes seconds. However, if you blindly copy an entire event without filtering the data, you risk carrying over expired registration deadlines, old pricing tiers, and outdated invitee lists that will immediately break your new registration flow.
Here is a best-practices guide on how to copy a Cvent event safely, what you should copy, and what you must always leave behind.
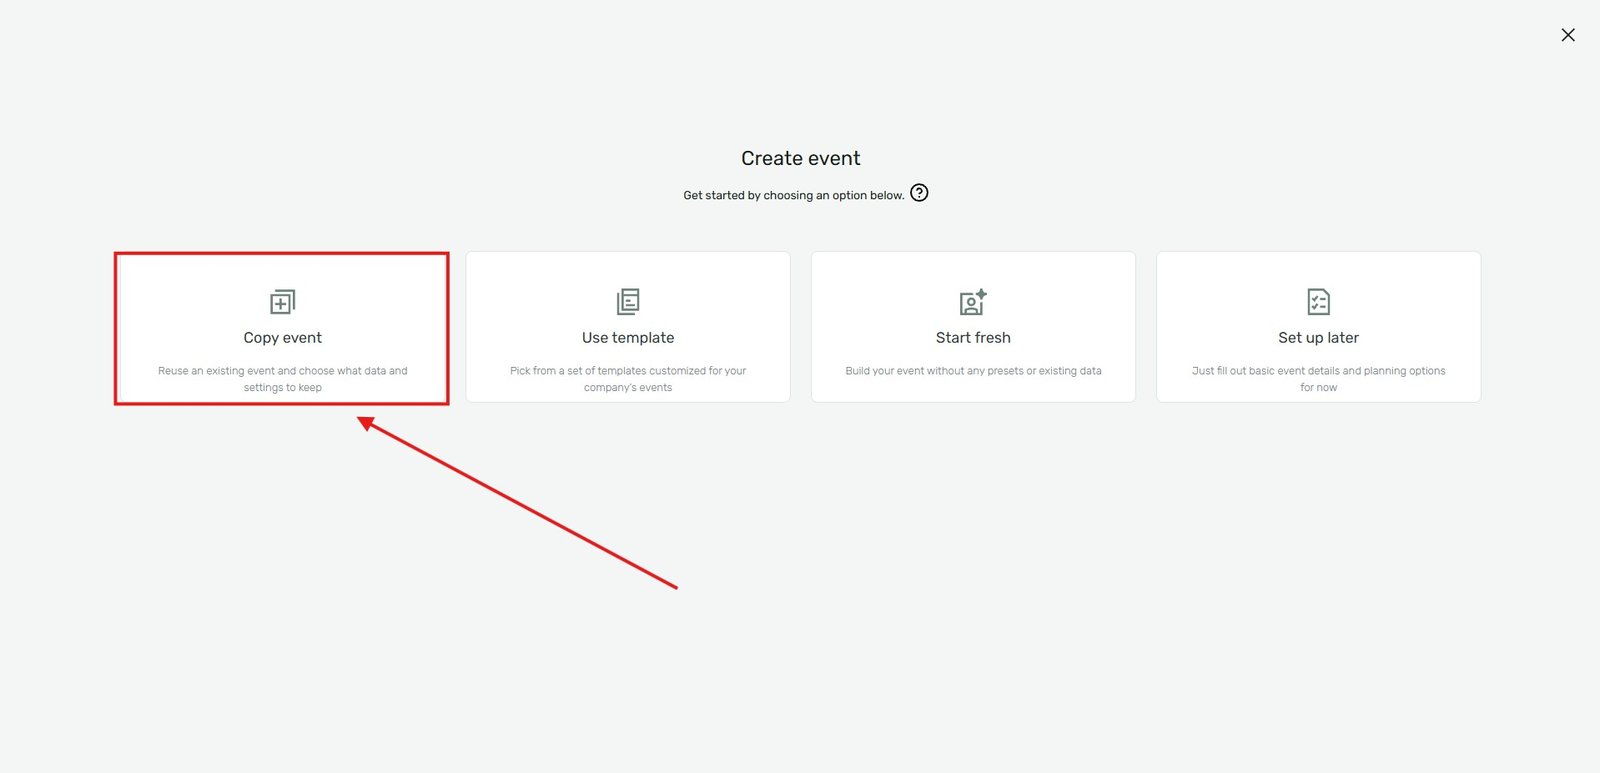
1. Initiating the Copy Process
In Cvent, you have two ways to start the duplication process, depending on where you are currently working in the platform.
Option A: From the Global Events Page
Navigate to your main Events dashboard (the global list of all your events).
Click the Create Event button in the top right corner.
Select Using an existing event as a template.
Search for and select the event you want to clone, then click Next.
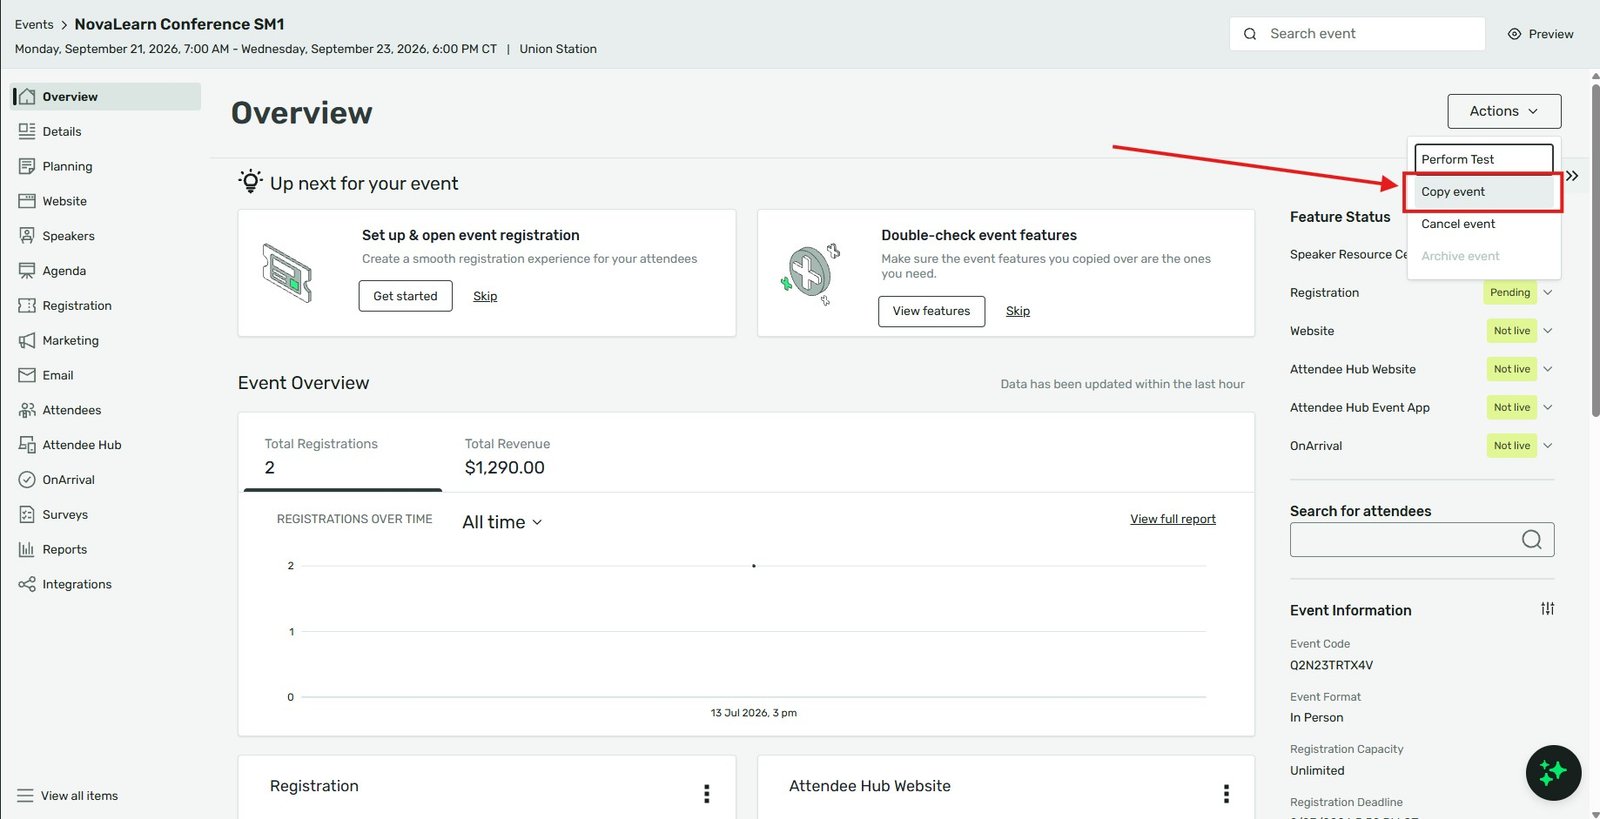
Option B: From Within the Existing Event
If you are already inside the event you want to copy, go to the event’s Overview page.
In the top-right corner, click the Actions button.
Select Copy event from the dropdown menu.
(Note: If you do not see this option, your Cvent user role does not have permission to create events).
2. What to ALWAYS Copy (The Safe List)
Your goal is to bring over the architectural framework of the event without bringing over the historical attendee data. Check these boxes to save yourself hours of rebuild time.
Check these boxes:
Event Website & Registration Process: This copies your entire Site Designer layout, brand colors, fonts, and custom CSS.
Registration Paths: This keeps your audience segmentation intact (e.g., VIP vs. General Attendee logic).
Contact Fields & Custom Questions: This brings over the blank forms, ensuring you ask the same survey questions as last year.
Email Templates: This copies your branded invitations and confirmation emails, saving you from having to redesign headers and footers.
3. What to ALWAYS Leave Behind (The Danger List)
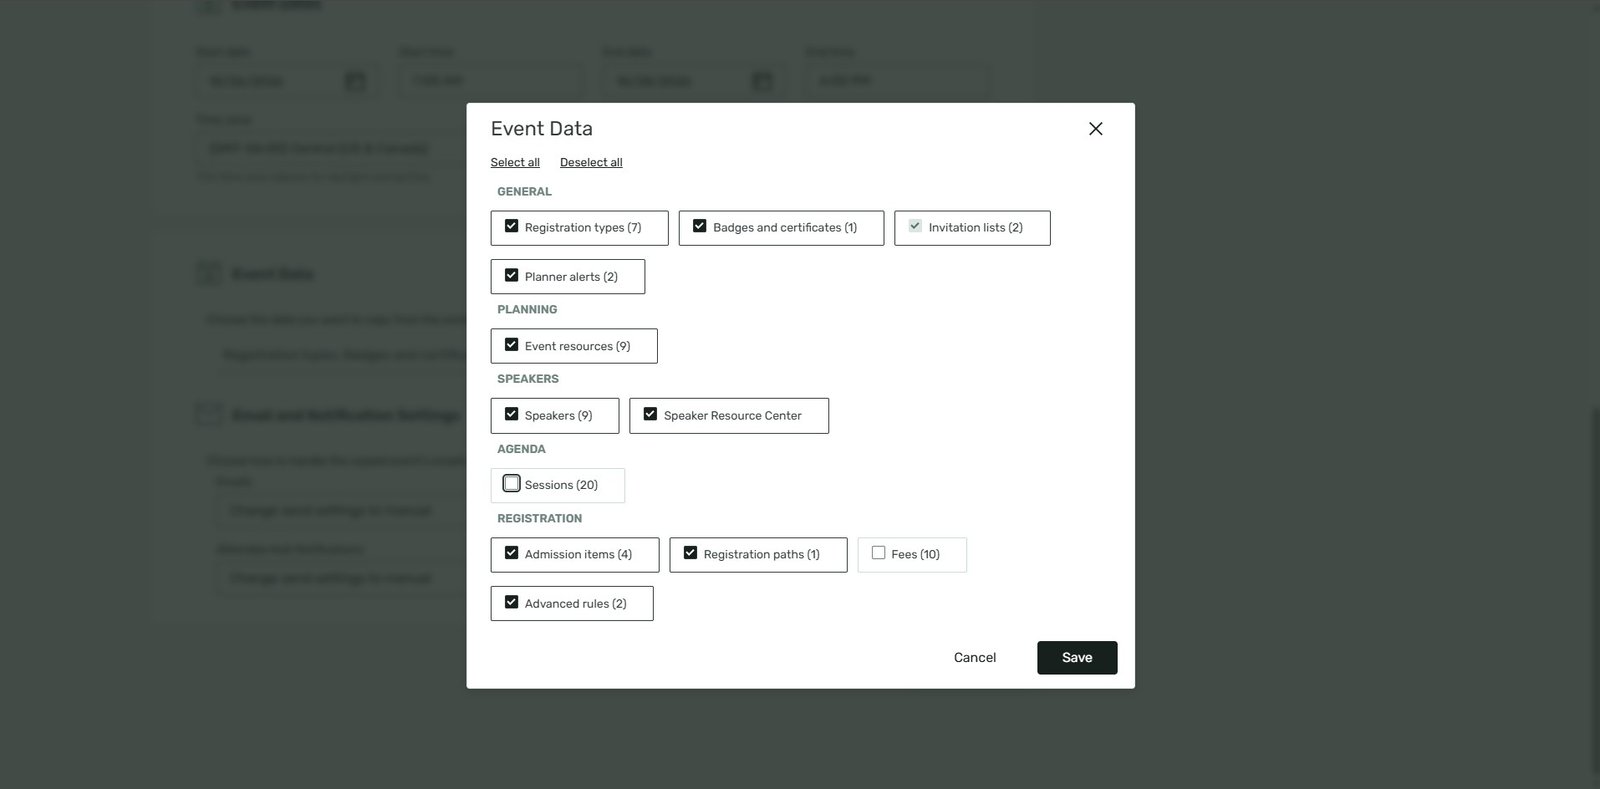
Leaving these boxes checked will pollute your new event with expired data that will lock out new attendees.
Uncheck these boxes:
Invitee Lists & Address Book: Never copy the old invitee list. It will pull in people who declined last year, or worse, carry over old “Opt-Out” statuses that will block them from getting this year’s invite. Always start with a fresh upload.
Pricing & Deadlines: While you can copy pricing, it is highly discouraged. Old early-bird deadlines will immediately trigger “Registration Closed” errors because the dates are stuck in the past. It is safer to rebuild your pricing items.
Session Capacities: If a room held 50 people last year and 50 people registered, the capacity will carry over as “Sold Out.” Build new sessions or manually wipe capacities clean.
4. The Post-Copy Audit (The "Find and Replace")
Even with a perfect copy, there is always hardcoded text left over from the previous year.
How to Clean It Up:
Open the Site Designer.
Check your static text widgets. If you manually typed “Welcome to our 2025 Conference” on the home page, Cvent will not automatically update that to 2026. You must manually rewrite it.
Check your fees and update any discount codes with their associated active dates.
Navigate to the Email section. Double-check that your emails are scheduled to send on the correct new dates, and ensure any static text or hyperlinks within the email bodies are updated.
Agency Pro-Tip: Do not use a past live event as your base template. Instead, create a blank “Master Template Event” in your account that has your agency’s standard branding, custom fields, and email designs, but zero dates or pricing. Always copy from this Master Template to ensure a totally clean start every time.
Key Takeaways
Two ways to copy: Use the global “Create Event” button or the “Actions” menu directly inside an existing event.
Filter the data: Use the “Change selection” menu in the wizard to explicitly check the boxes for data you do not want to copy.
Update static text: Cvent copies exactly what you typed. Remember to manually update years, dates, and locations typed into Site Designer text blocks and email templates.
Check your dates: Always audit your pricing, discount codes, and scheduled email send dates immediately after the copy finishes.