
This is a real point of confusion that comes up even for planners who’ve run multilingual events before, and it was directly confirmed by Cvent’s own support team in a recent community thread: your event website (the registration site) and your Attendee Hub (web and mobile) are two independent systems when it comes to language. Turning on a second language for one does nothing for the other. If you only set up one, attendees can end up registering in fluent French and then landing in an Attendee Hub that’s still entirely in English.
Here’s how to set up both correctly, and what still needs manual translation either way.
Part 1: Your Event Website (Registration Site)
Step 1: Turn on the multi-language event setting
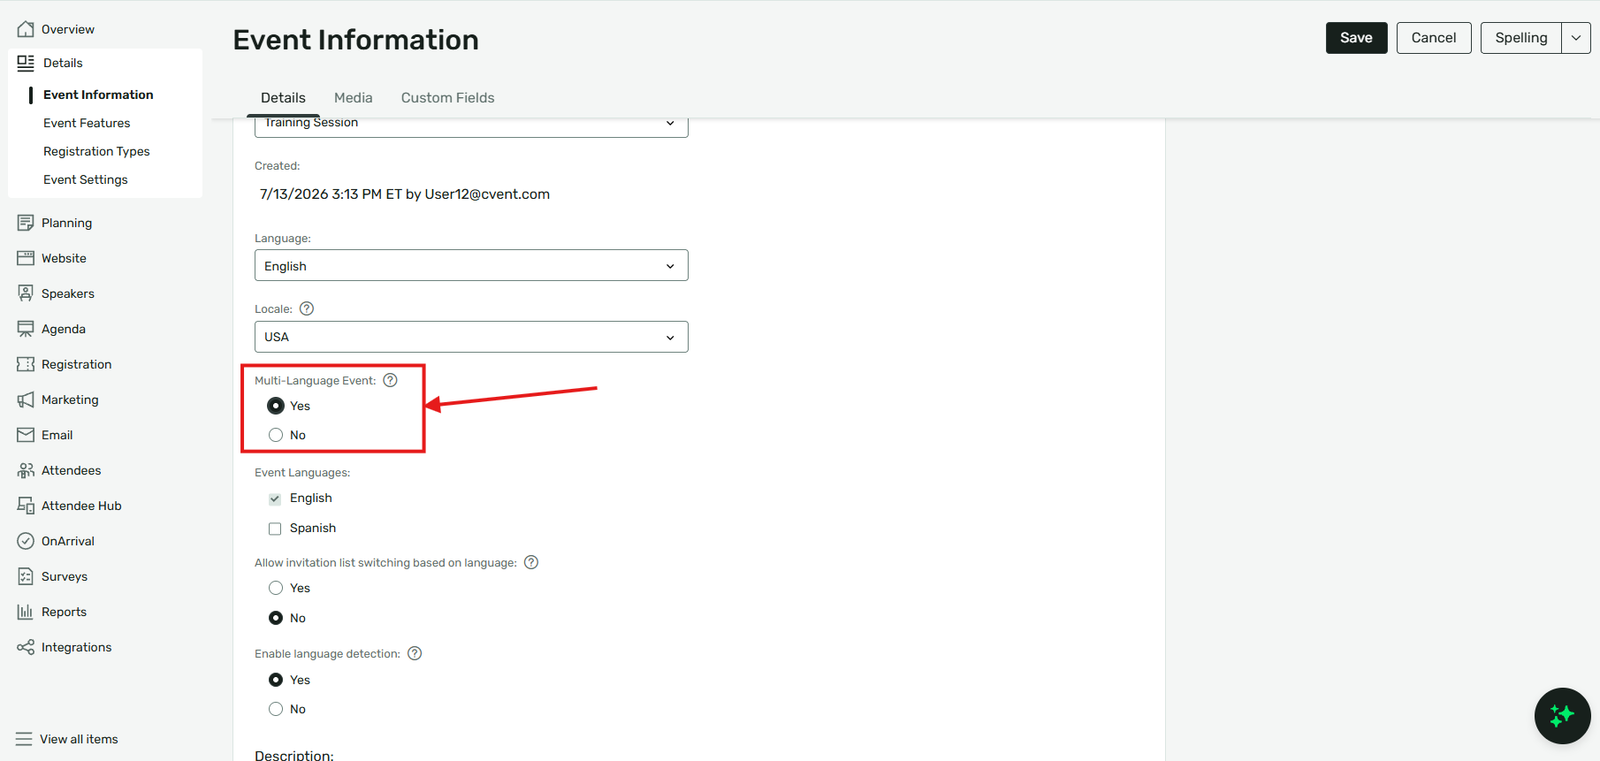
Go to General → Event Information and enable the multi-language event setting for your event. This is the master switch — without it, none of the language tools below are available.
Step 2: Add the Language Selector Widget to your site
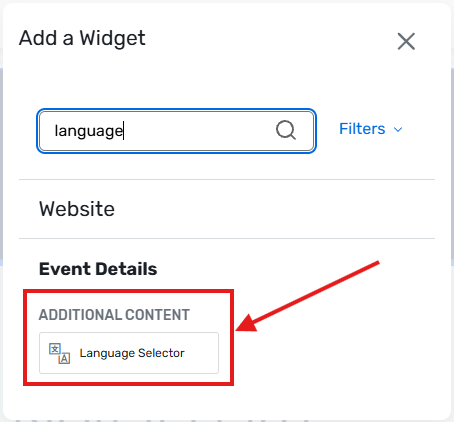
In Site Designer, add the Language Selector Widget to your event website. This is what lets registrants actually switch languages themselves, and it applies across your website, the registration process, and any surveys tied to the event — not just the homepage.
Step 3: Set up a separate invitation list per language
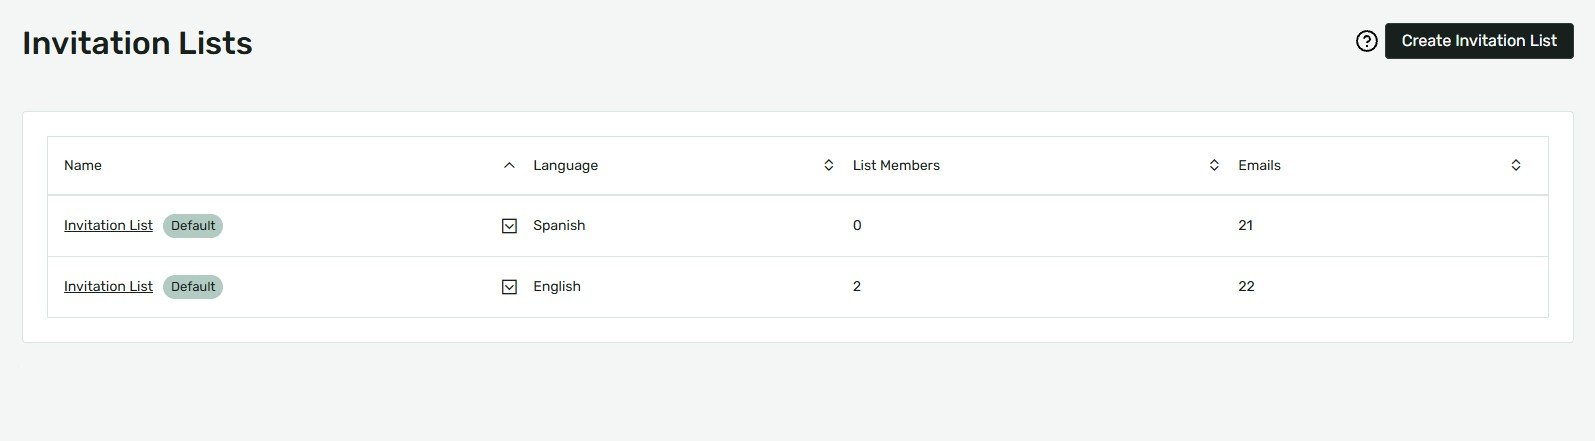
With a multi-language event, you’ll maintain a separate invitation list for each language you’re supporting. This matters beyond the website itself — the confirmation and reminder emails tied to each list are automatically translated to match, so a registrant on your French invitation list gets French emails without any extra setup on your end.
Step 4: Know what's NOT automatically translated
Cvent auto-translates standard system labels and instructional text. It does not auto-translate:
- Session names and descriptions
- Custom questions and their answer options
- Any custom text blocks, banners, or instructions you wrote yourself
This content has to be translated manually — which is what Language Management is for.
Step 5: Manually translate custom content in Language Management
Go to Website & Registration → Website → Language Management. This screen lists every piece of system text in your event by Text ID, alongside its Default Text, with a place to enter Custom Text for each language you’ve added.
- Use Advanced Search to filter by Registration Path, Text ID, Default Text, Custom Text, or Area/Type — the full list can be long, and searching by a word you know is on the page (like “Agenda” or “Submit”) is faster than scrolling.
- Click the pencil icon next to a Text ID to enter your translation, then the floppy disk icon to save it.
- Repeat for each custom question, session title, and description you’ve written — these won’t appear translated on your live site until you’ve entered them here, even if the rest of the page looks fully translated.
Part 2: Your Attendee Hub (Separate From the Website)
This is the part that catches people off guard: enabling multiple languages on your event website does nothing for your Attendee Hub. They’re managed independently, on both web and the mobile app.
Step 1: Enable additional languages for Attendee Hub
Attendee Hub has its own language settings, separate from the event website’s multi-language toggle. Once a second language (say, French) is enabled for the Hub, most of its system text — navigation, buttons, standard labels — is automatically translated by Cvent, the same way the website’s system text is.
Step 2: Manually translate planner-created content
Just like the website, anything you wrote isn’t auto-translated:
- Session names and descriptions
- Custom pages or sections
- Any other custom text you’ve added to the Hub
Translate these under Marketing → Language Management, selecting the specific language (e.g., French) and working through the Translations tab.
A note on the "In Progress" status
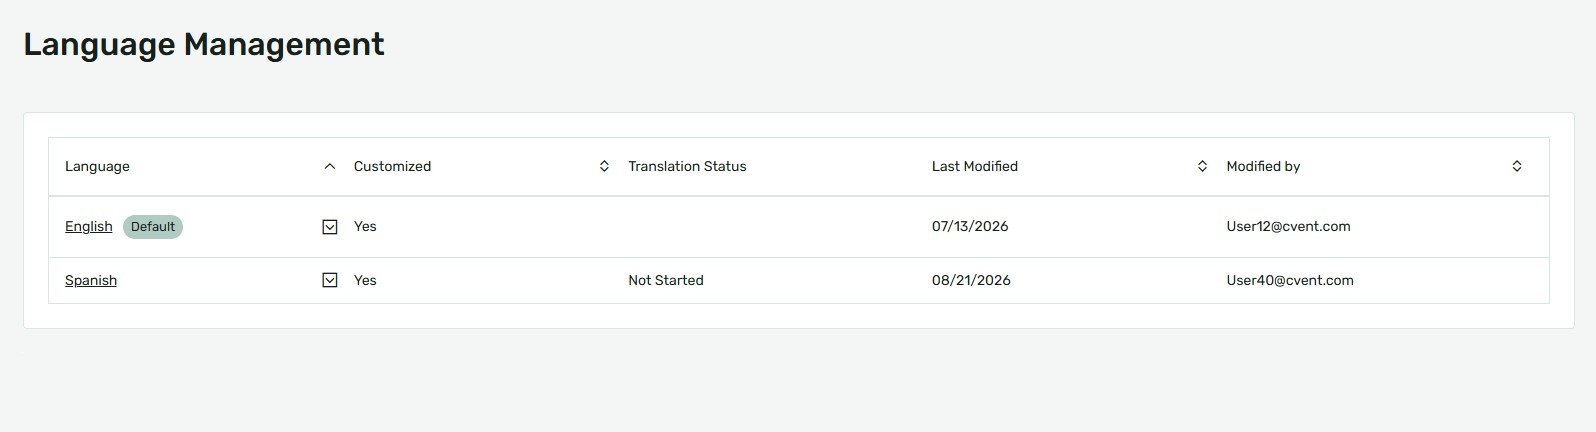
If you check Language Management and see a language marked “In Progress,” that’s not an error or a sign that something’s broken — it just means some strings for that language have been customized already. It doesn’t block Cvent’s automatic system-text translation from working in the meantime; it’s purely a marker for how much of your own manual translation work is done.
Step 3: Know how attendees actually change their language
This differs by platform, and it’s worth knowing so you can tell attendees what to expect:
- Attendee Hub (web): may default to the attendee’s browser language automatically. Attendees can change it anytime under Profile → Language.
- Attendee Hub (mobile app): initially follows the device’s language setting at the time the app is installed — it won’t update automatically if they change their phone’s language later. Attendees can change it manually under Profile → Settings → Language & Time.
Common issues and how to fix them
Attendees registered in a second language, but the Attendee Hub is still in English. This is the core gotcha — the Attendee Hub has its own separate language setup. Confirm you’ve enabled the second language for the Hub specifically, not just the event website.
Some Attendee Hub text is translated, other parts aren’t. System text is automatic; anything you wrote (sessions, custom pages, custom text) needs to be entered manually under Marketing → Language Management.
A language shows “In Progress” and you’re not sure if it’s working. It is — this status only reflects how much manual translation you’ve completed, not whether the automatic system translation is functioning.
A registrant’s app didn’t switch language when they changed their phone’s language. Expected behavior — the app locks to whatever language the device was set to at install. They’ll need to change it manually in the app under Profile → Settings → Language & Time.
The takeaway
Treat your Cvent event website and your Attendee Hub as two separate translation projects, even though they’re part of the same event. Each has its own enablement step, its own automatic system-text translation, and its own Language Management screen for the custom content you wrote yourself. Set both up deliberately, and check Language Management on each platform specifically — not just one — before you assume your event is fully translated.