Registration & Pricing

Fixing the “Not All Fields Filled Out” Error During Cvent Registration

Few things cause higher registration abandonment rates than an attendee getting stuck on a page with a red error message reading: “You have not filled out all required fields.” The frustration peaks when the attendee looks at the form and sees that every visible box is already filled out.

When this happens, Cvent is demanding an answer for a field that is either accidentally hidden from the attendee’s view, missing from the webpage layout entirely, or trapped behind conflicting logic. Here is how to track down the “phantom” field and fix the error.

1. Replicate the Error to Identify the Culprit

Before you start digging through settings, you need to know exactly which field is causing the block.

How to Fix It:

  1. Open your event website in an incognito window and run a test registration.

  2. Try to progress past the page where attendees are getting stuck.

  3. When the error pops up, look for the red text indicating the specific missing field.

  4. If the field is completely invisible on your screen, note the page you are on (e.g., Personal Information, Registration Questions, or Session Selection). This tells you where to look in the backend.

2. Check Visibility vs. Requirement Settings

The most common cause of this error is a mismatch in Registration Paths. You might have made a question mandatory for everyone, but accidentally set the visibility so it only shows up for a specific group (like Sponsors or VIPs).

How to Fix It:

  1. Navigate to Registration > Registration Process.

  2. Open the Site Designer by clicking Customize.

  3. Click on the registration page where the error occurs.

  4. Select the widget containing your questions (e.g., the Contact Fields or Custom Questions widget).

  5. In the right-hand configuration panel, check the Visibility Logic. Ensure that if a field is marked with a required asterisk (*), its visibility is set to display for the exact same audience that is required to answer it.

Field Visibility | Attendeegain

3. The Field is Missing from the Canvas

You might have created a new Custom Contact Field in your global Cvent address book and marked it as “Required for all events.” However, if you forgot to physically drag and drop that specific field onto your event’s Site Designer canvas, the system still requires it but gives the attendee no way to fill it out.

How to Fix It:

  1. Go to Registration > Registration Process > Customize to open the Site Designer.

  2. Go to the Personal Information page.

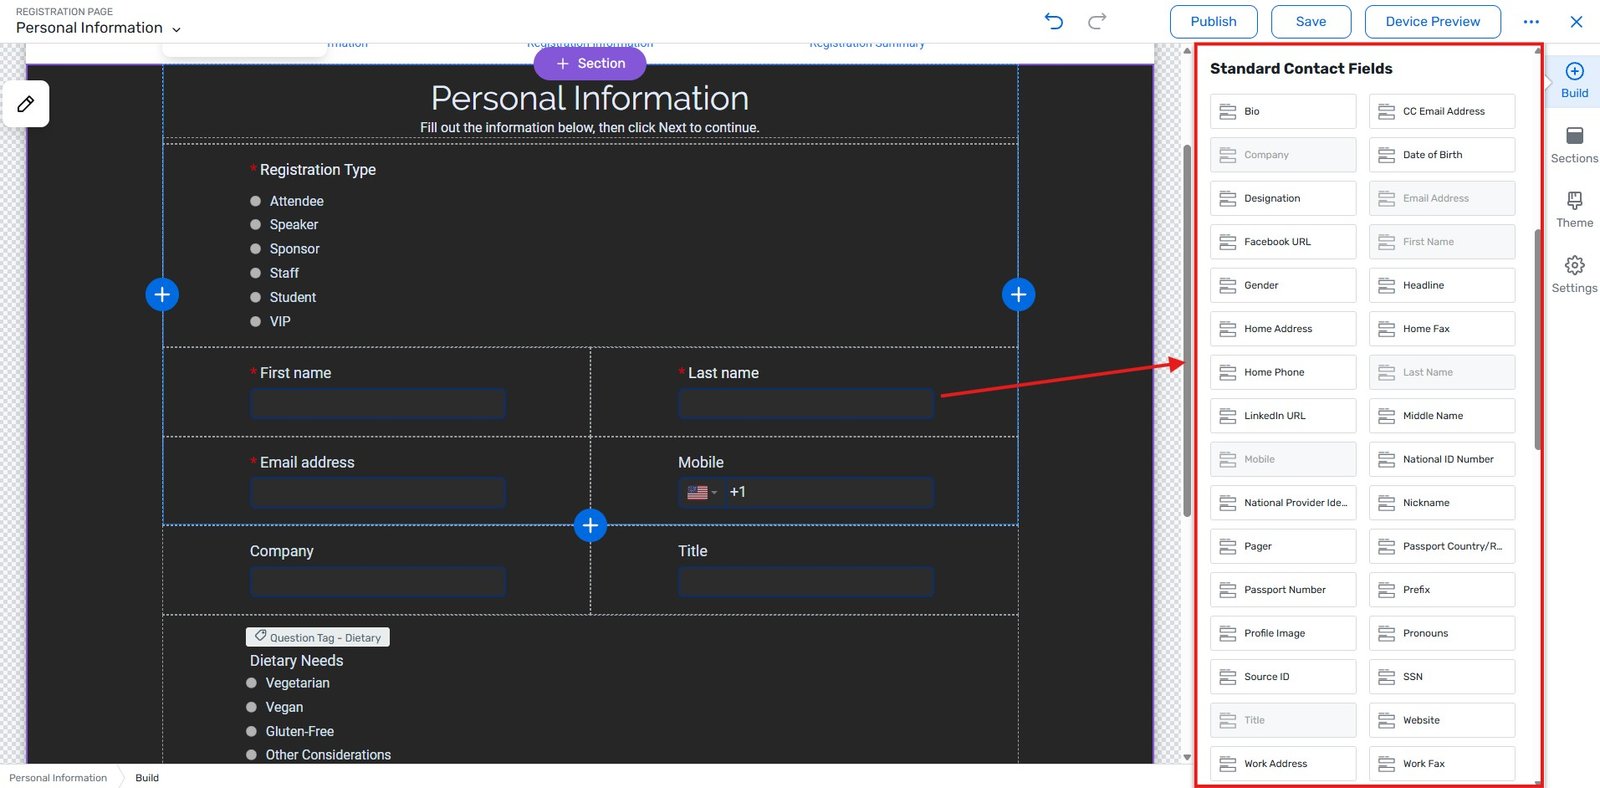
  3. Click on the Contact Fields widget.

  4. In the right-hand panel, look at the list of included fields. If you know a field is globally required (like “Company” or “Mobile Phone”) but it isn’t listed here, click Add Field and add it to the form.

Contact Fields | Attendeegain

4. Check for Conflicting Conditional Logic

If you are using Advanced Logic for custom questions, you might have created a trap. For example: You set “Dietary Restrictions” to be a required question. However, you set a logic rule that says “Only show Dietary Restrictions if the attendee answers YES to attending the dinner.” If they answer NO to the dinner, the dietary question hides, but the system still demands an answer because it is marked as mandatory.

How to Fix It:

  1. Exit the Site Designer and go to Registration > Registration Questions.

  2. Find the problematic question and click to edit it.

  3. If this question relies on parent logic (it only appears based on a previous answer), do not check the hard “Required” box on the main question setup.

  4. Instead, manage the requirement solely through the Advanced Logic tab, ensuring it only becomes required if the condition to display it is met.

Agency Pro-Tip: If you have multiple Registration Paths, you must test every single path end-to-end. A form that works perfectly for a General Attendee might have a hidden required field that breaks the flow for an Exhibitor.

Key Takeaways

  • Find the invisible block: The error almost always means a field is flagged as mandatory in the system settings, but hidden from the user’s screen.

  • Match visibility to requirements: Never make a field mandatory for all registration paths if it is only visible to one specific path.

  • Update the Site Designer: If you make a field required in your global account settings, you must remember to drag that field onto the registration page in the Site Designer.

  • Careful with conditional logic: Avoid hard-requiring sub-questions that are designed to be hidden based on how an attendee answers a parent question.

Fixing the “Not All Fields Filled Out” Error During Cvent Registration Read More »

Why Session Fees Aren’t Showing Up on Your Session Selection Page in Cvent

Before assuming something’s broken, it’s worth knowing that Cvent scopes both session visibility and session fee display fairly tightly by design — tied to admission items, registration types, and the fee configuration on the session itself. Most of the time, a missing fee traces back to one of a handful of specific settings rather than a platform bug. Here’s what to check, in order.

Cause 1: The session doesn't actually have a fee configured

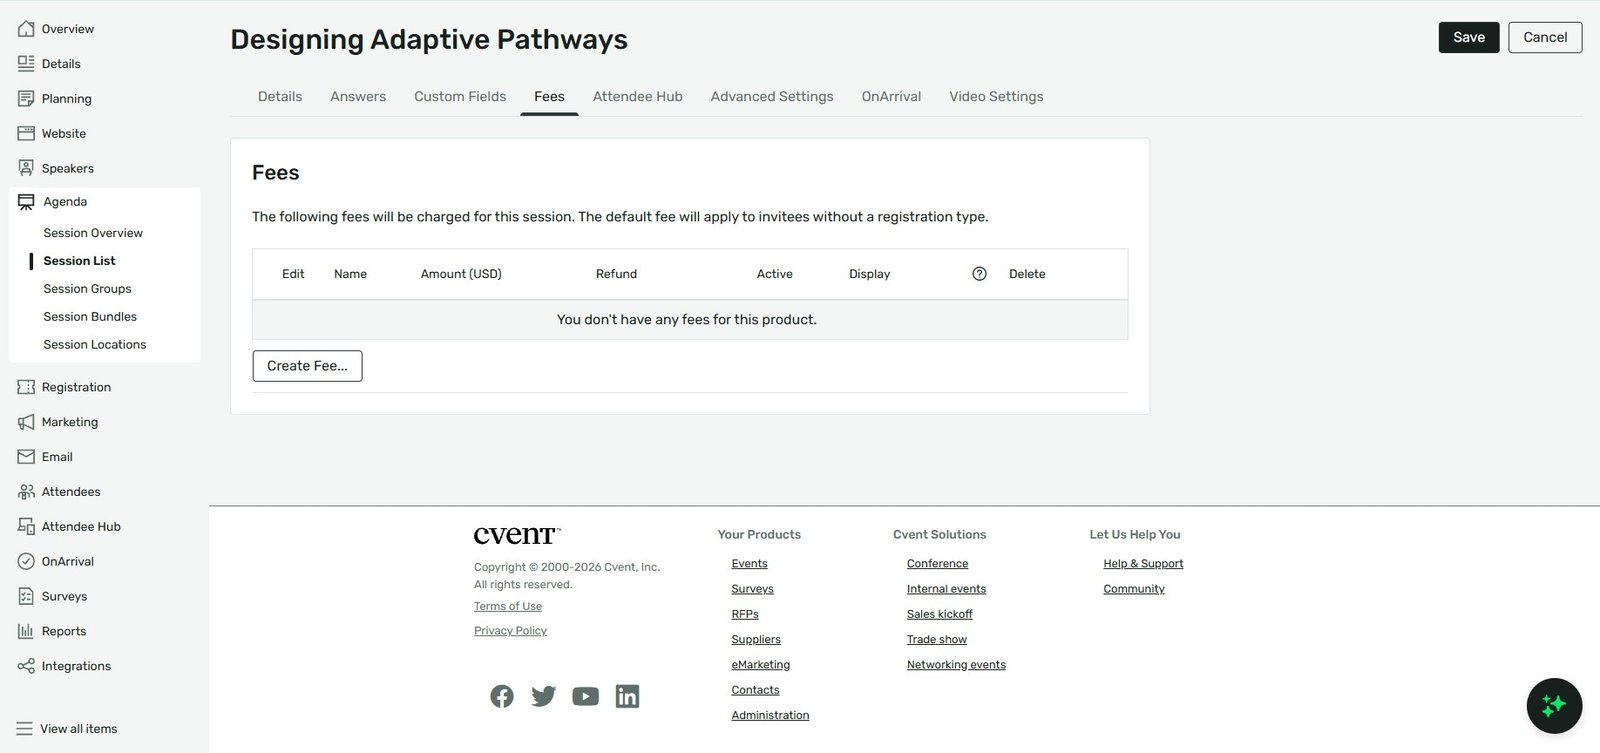
This sounds obvious, but it’s worth confirming directly rather than assuming: open the session and check its fee setting. Cvent gives you three options here — No fee, a simple fee, or an advanced fee with discounts or refunds. If “No” was selected (or accidentally left at the default), there’s nothing to display, and that’s expected behavior rather than a bug.

Setting a fee on a Cvent session | Attendeegain

Cause 2: The session is excluded by the admission item's session rules

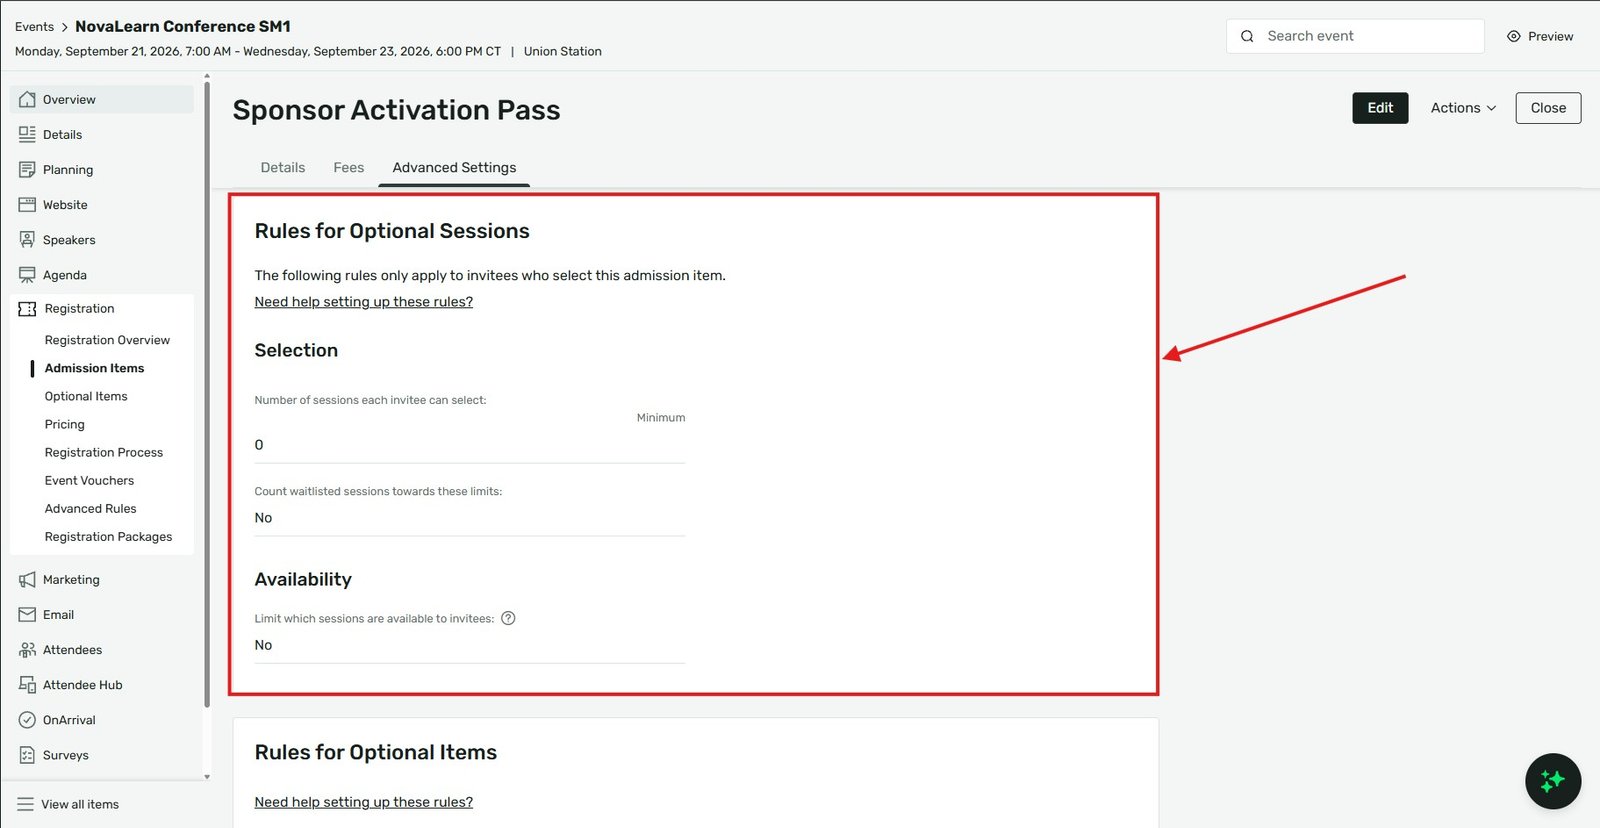
This is the most common real cause, and it’s easy to miss because it’s configured on the admission item, not the session itself. Cvent has a feature specifically for limiting which sessions are available based on the admission item someone selects — commonly used to make sure, for example, someone who bought a single-day pass only sees that day’s sessions.

Check: Registration → Admission Items → [the admission item] → Advanced Settings → Rules for Optional Sessions. If “Limit which sessions are available to invitees” is switched to Yes, only the sessions explicitly checked in that list will appear for someone using that admission item — everything else, fee included, simply won’t show. If the session you’re troubleshooting isn’t checked here, that’s your answer.

Limiting which sessions are visible per admission item in Cvent | Attendeegain

Cause 3: The session isn't scoped to the registration type you're testing with

Separate from admission item rules, session and fee visibility can also depend on registration type. If you’re testing as an admin or with a test account under a different registration type than your actual registrants will use, you may simply be looking at a scoping mismatch rather than a display problem. Always test session and fee visibility using an account under the same registration type and admission item your real registrants will have — not just an admin preview.

Cause 4: What you're missing is actually a tax or service fee, not the session price

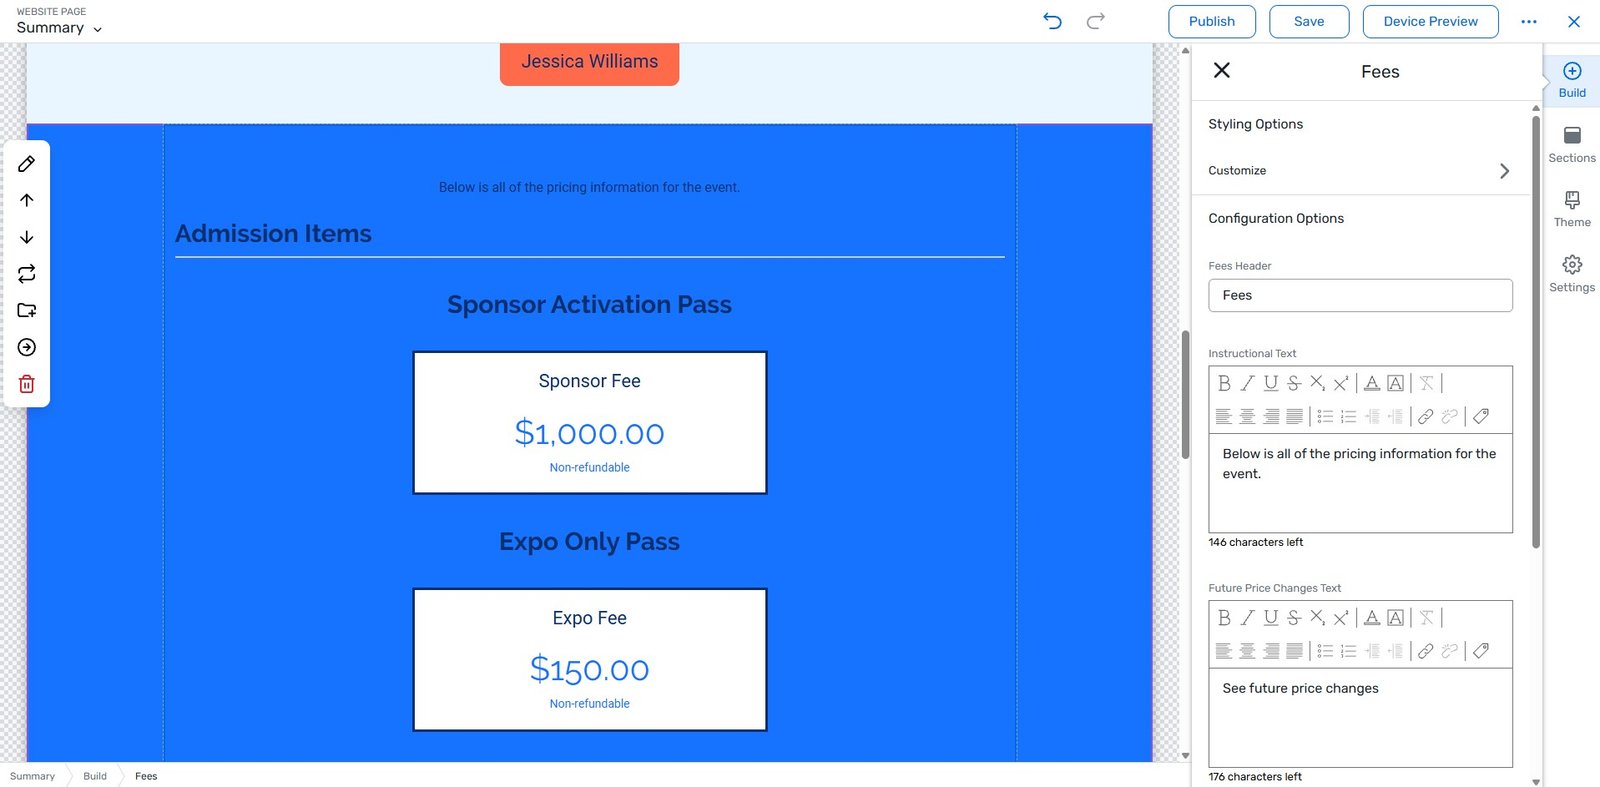
If the specific line item that seems to be missing is a tax or service charge rather than the base session price, that’s expected: Cvent’s Fees widget — the standalone widget used to display a pre-registration summary of prices — explicitly does not show taxes or service fees, by design. If your session’s base price is showing correctly and it’s only the tax/service component that seems absent, there’s nothing to fix; that’s documented behavior, not a bug.

Cvent Fees widget displaying session prices without taxes or service fees | Attendeegain

Check both places fees can display

Cvent has two different places a fee might be expected to show, and they’re configured separately:

  • The Fees widget — a standalone summary widget (added via Event Website → Customize → Product Information section) meant to preview pricing before registration begins.
  • The session/item selection screen itself, during the live registration flow — where price typically displays inline next to each selectable session.

If a fee is missing from one but correctly showing in the other, you’re likely dealing with a widget-level display setting rather than a fee configuration issue — double check the specific widget’s settings rather than assuming the fee itself is misconfigured.

Testing checklist

  1. Confirm the session’s fee is actually set to a paid option, not “No fee.”
  2. Check the relevant admission item’s Rules for Optional Sessions — confirm the session is checked if session limiting is turned on.
  3. Register a test account under the same registration type and admission item as your real registrants, not just as admin.
  4. If a specific tax/service line seems to be missing, confirm you’re not expecting the Fees widget to show something it’s documented not to display.

The takeaway

A missing session fee on the selection page is almost always a scoping issue — either the session itself has no fee attached, or an admission item’s session-limiting rules are quietly filtering it out for the registration type you’re testing with. Check the fee setting first, then the admission item’s Advanced Settings, and always test as a real registrant type rather than relying on the admin view, which can mask exactly this kind of scoping mismatch.

Why Session Fees Aren’t Showing Up on Your Session Selection Page in Cvent Read More »

How to Reuse a Registration Template Across Multiple Cvent Events Without Rebuilding It Each Time

If your organization runs the same kind of event repeatedly — an annual conference, a recurring dinner series, quarterly training sessions — rebuilding registration types, custom questions, and site design from a blank event every single time is a real time sink. Cvent has more than one way to avoid this, and which one fits depends on what exactly you’re trying to reuse: the whole event structure, just the registration questions, or specific components like invoices and pricing text.

Method 1: "Use an Existing Event" (the broadest option)

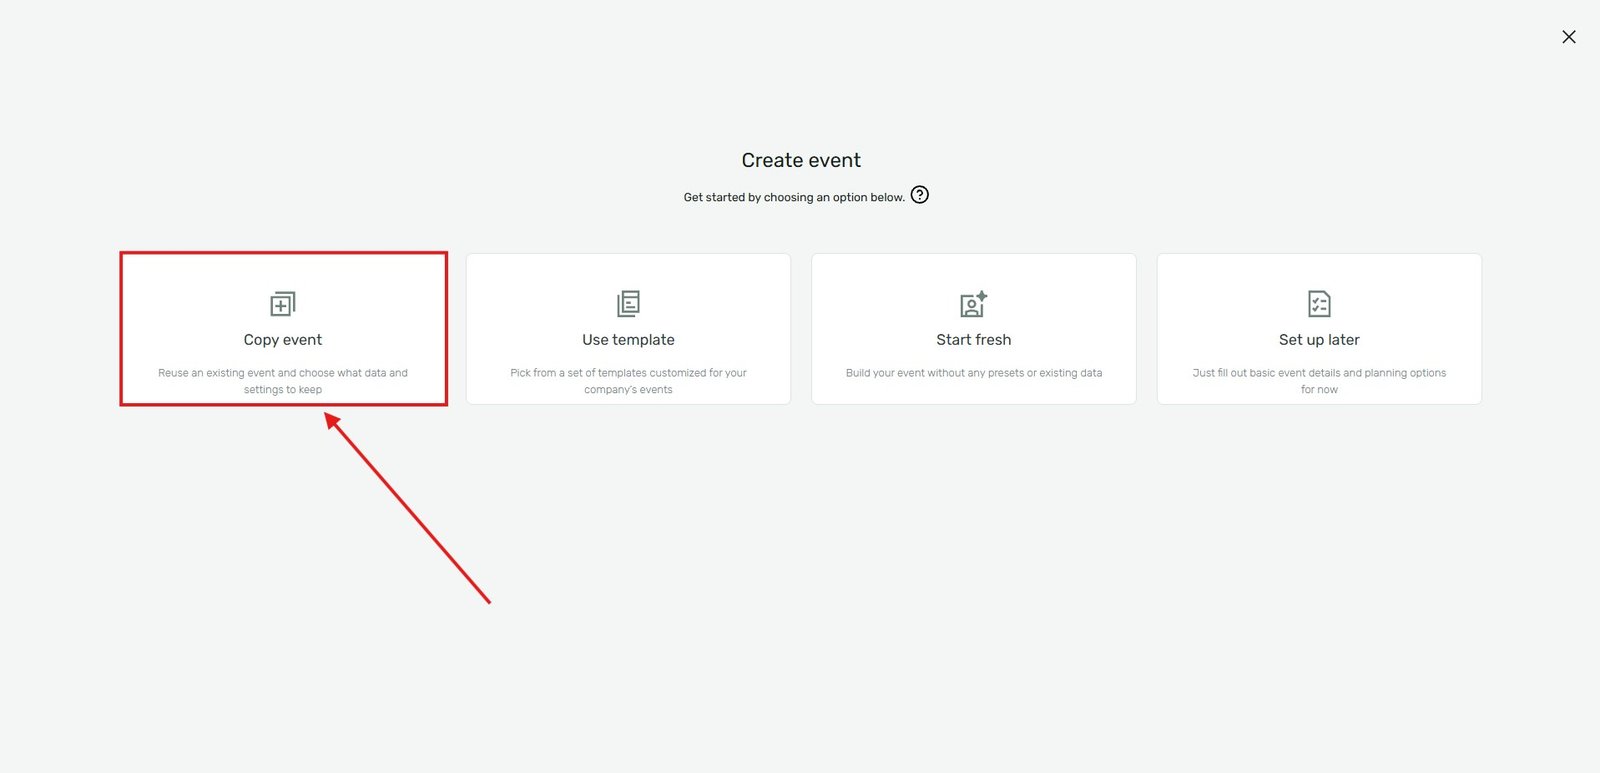
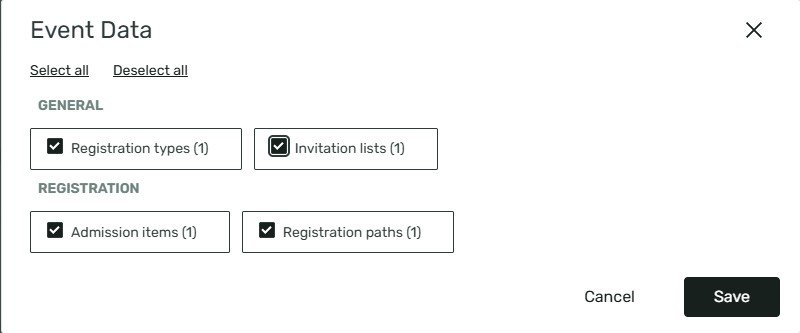
When creating a new event in Cvent, there’s an option to base it on an existing one rather than starting blank — commonly referred to as Use an Existing Event. This carries over the registration setup from the event you select, including things like registration types, custom questions, and site design, instead of making you rebuild each piece individually.

The real value of this comes from being deliberate about what you duplicate from. One practical approach shared by a longtime Cvent admin in the community: rather than duplicating whatever your most recent live event happened to be, build clean, purpose-built template events for each recurring event category your organization runs — for example, one for “Advisory Board,” one for “Speaker Training,” one for “Dinner” — and always duplicate from those, not from a real past event. A real past event tends to accumulate one-off tweaks, outdated pricing, or event-specific text that isn’t meant to carry forward; a dedicated template event stays clean and general-purpose specifically because nothing ever registers for it directly.

Use existing event | Cvent | AttendeeGain

Method 2: Registration Templates (for standardizing data collection)

Separate from duplicating a whole event, Cvent has a dedicated Registration Templates feature at the administrator level, built specifically to keep data collection consistent across events — standard questions, custom contact fields, and consent questions can all be packaged into a template and selected during event creation, rather than trusting every event builder to recreate the same set of fields correctly by hand.

Worth noting: based on Cvent’s own product documentation, this specific templating tool has been introduced in the context of webinar creation — so if you’re setting up in-person or hybrid Event Management events rather than webinars, check whether this option is available to you, or whether “Use an Existing Event” is your primary route instead. Availability can depend on your specific Cvent product and account configuration.

Registration selection | Cvent | AttendeeGain

Method 3: Account-level templates for specific components

Not everything needs to be duplicated at the whole-event level. Some pieces — like invoices — can be set up once as an account-level template and reused across every event without being tied to any single source event at all. One real example from the community: building a single account-level invoice template, linking it from the confirmation email and confirmation page, so that generating a one-off invoice for any registrant across any event only takes a couple of clicks rather than rebuilding formatting each time.

Method 4: Datatags for content that needs to stay in sync

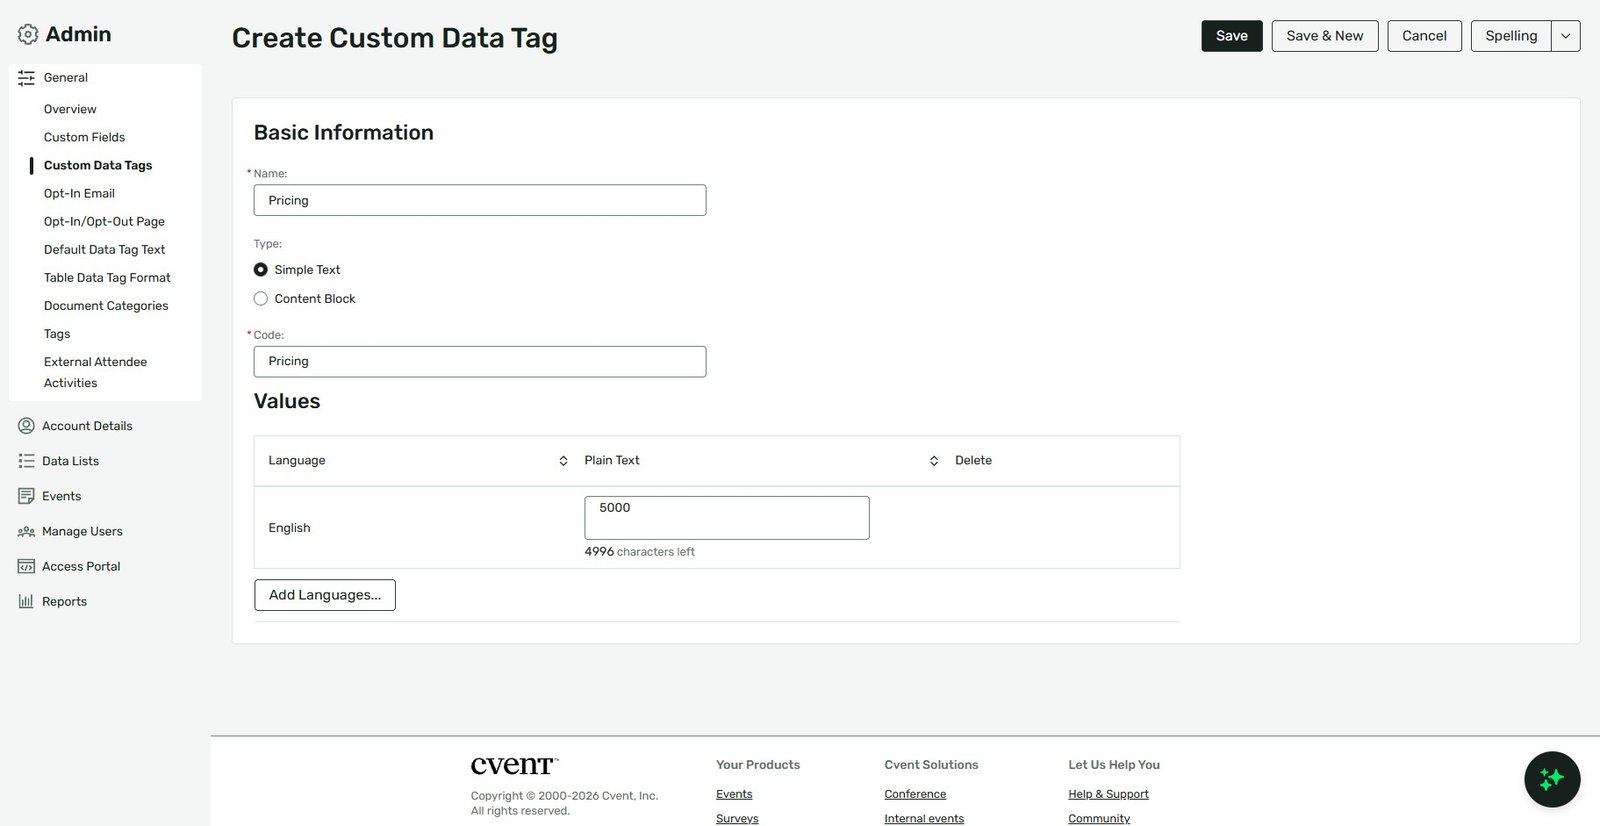
If what you’re actually trying to avoid is re-typing the same piece of text in many places within (or even across) your registration setup — a price, a policy line, a recurring instruction — Datatags solve a slightly different problem than event duplication. A datatag lets you update content in one place and have it automatically reflect everywhere it’s been inserted, rather than manually hunting down every instance across pages, emails, and confirmation screens. This is especially useful for things likely to change between events, like pricing or dates, since you only need to update the tag once rather than search-and-replace across your whole site and email set.

Custom Data Tag | Cvent | AttendeeGain

What to double-check after duplicating (regardless of method)

Duplication saves setup time, but it doesn’t mean the new event is ready to publish as-is. After using any of the above, review:

  • Dates and deadlines — these virtually never carry over correctly and need to be updated for the new event.
  • Pricing and discount codes — confirm fees reflect current pricing, not whatever was live on the source event.
  • Capacity limits — a cap that made sense for last year’s venue may not fit this year’s.
  • Any event-specific text — session descriptions, banners, or instructions tied to the prior event’s specifics.

The takeaway

There isn’t one single “reuse” button in Cvent — there are several tools depending on what you’re duplicating. Use “Use an Existing Event” (ideally from a dedicated, clean template event, not a messy past one) when you want the whole registration structure to carry over, Registration Templates when you specifically want to standardize the questions and fields being collected, account-level templates for standalone components like invoices, and Datatags for keeping shared content in sync without manual re-editing. Whichever you use, always review dates, pricing, and capacity before publishing — duplication saves the structural work, not the event-specific details.

How to Reuse a Registration Template Across Multiple Cvent Events Without Rebuilding It Each Time Read More »

Why Your Link Logic Isn’t Skipping Registration Pages the Way You Set It Up in Cvent

If you’ve set up Link Logic (sometimes called “Advanced Logic”) on a custom contact field, expecting it to change the field’s available options based on which registration type or path someone is using, and it just isn’t taking — you haven’t misconfigured anything. This is a real, current platform limitation, confirmed directly by Cvent’s support team: the source question for Link Logic can only be another custom contact field. Registration type and registration path are not valid source options, even though it seems like they logically should be.

This guide covers what Link Logic actually does, why the registration-type approach doesn’t work, and the two features people successfully use instead to get the same practical result.

What Link Logic actually does

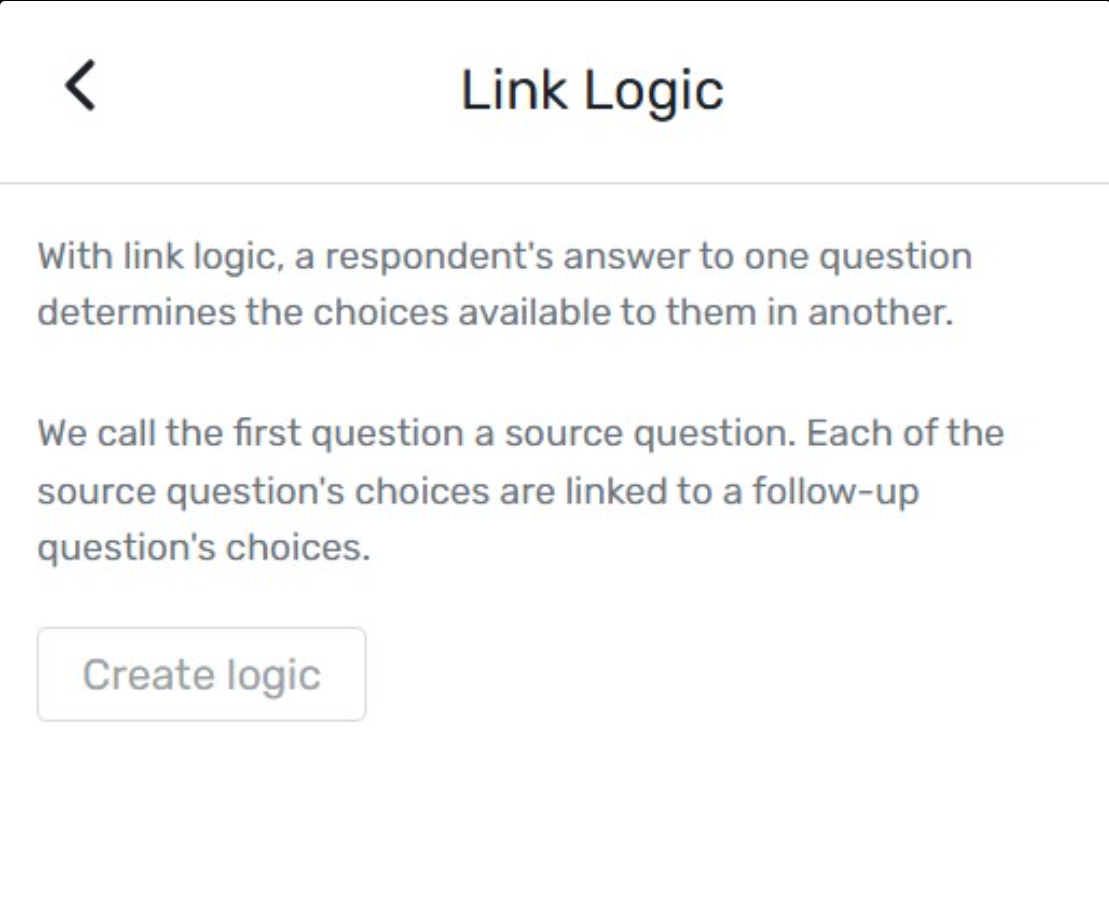
Link Logic lets you connect two custom contact fields so that the available answer choices on one field change based on what was selected in another. For example: a “State/Province” custom field that only shows relevant options once someone has selected their “Country” custom field first. That’s the feature working as designed — one custom field driving another.

Where people get tripped up is trying to use the same mechanism to drive a custom field’s options off something that isn’t a custom contact field — most commonly, registration type or registration path. As confirmed directly by Cvent support: that’s not an available source option, regardless of how the logic is configured. If your team has multiple registration paths sharing one custom contact field, and you want that field’s options to differ by path, Link Logic on its own cannot do this.

Link Logic | Cvent | Attendeegain

What to use instead, depending on what you actually need

If you need to hide or show a text widget based on registration type

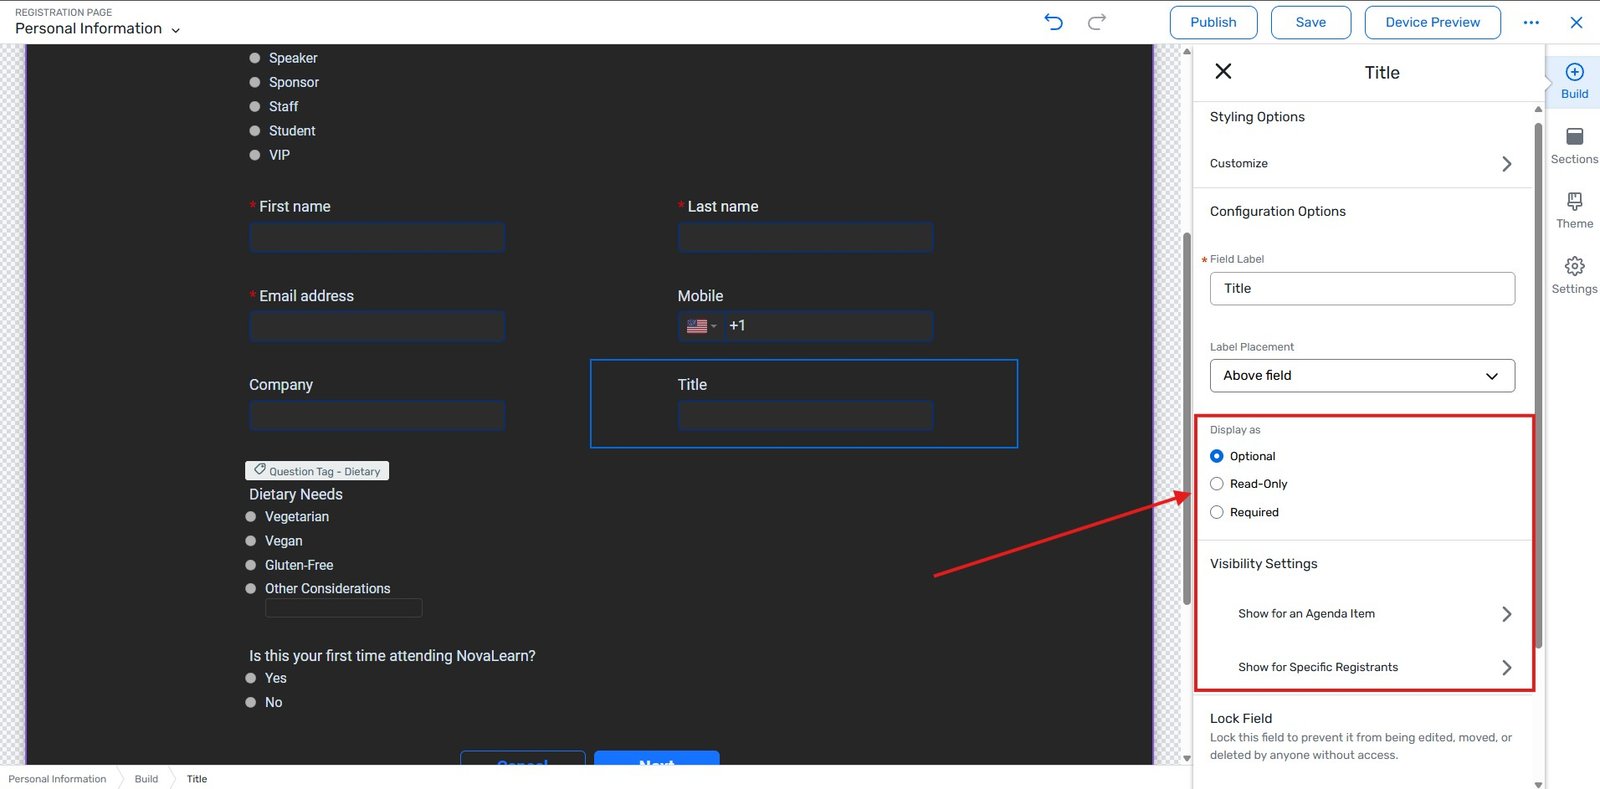
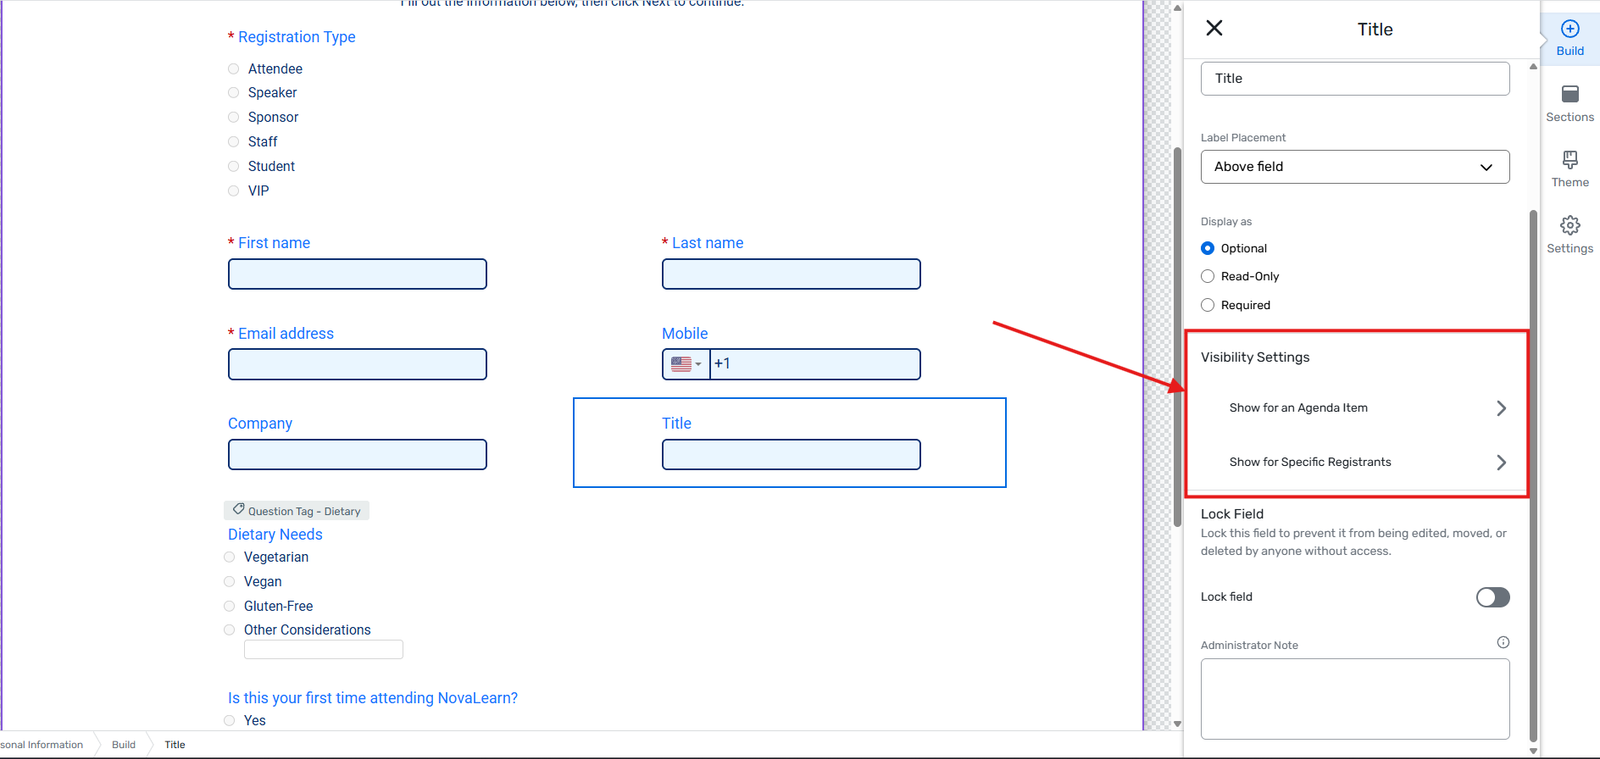
Use Widget Visibility Logic instead — a separate, related feature. It lets you hide or show text widgets (and certain built-in widgets, like hotel/travel booking blocks) based on conditions including a registrant-specific field, agenda items selected, or travel conditions. Registration type is accessible here too — it lives under Show for Specific Registrants, filed under contact fields in that widget’s visibility settings. This is the correct tool if what you’re actually trying to do is show different instructional text, banners, or messaging to different registration types on your site.

Specific Registrants | Cvent | Attendeegain

One real gotcha worth knowing here: the specific text a widget displays isn’t always editable from the widget’s own settings — some strings are actually generated by a different underlying condition than you’d expect. For example, hotel-widget text that looks like a generic “Book now” label may actually be tied to an air/travel request condition rather than the hotel condition itself. If a text change isn’t showing up where you expect, check Marketing → Language Management and search for the exact phrase — that’s usually where it actually lives, even when it’s not obviously connected to the widget you’re editing.

If you need an actual form field's behavior to change by registration path

Recreate the logic as a registration-level question with branching/conditional logic, rather than a custom contact field. Registration questions support conditional branches natively at the path level in a way custom contact fields currently don’t. It means duplicating some setup work if you were hoping to keep this at the contact-field level, but it’s the only way to get true path-dependent behavior today.

If this limitation is blocking something you actually need

Cvent support’s own guidance on this, direct from a staff response: if the lack of registration-type/path sourcing for Link Logic is a real blocker for your setup, submit it as a feature request under Participate → Product Ideas in the Cvent Community. This is a known, named gap — not a bug — and it’s the kind of thing the product team tracks demand for through that channel specifically.

Common issues and how to fix them

Link Logic’s source question dropdown doesn’t list registration type or path. Expected — only other custom contact fields are valid sources. Use Widget Visibility Logic or a registration-level branching question instead, depending on what you’re trying to control.

You changed widget text in the widget’s settings and it’s not updating on the live site. The text may actually be controlled through Language Management rather than the widget itself, especially for built-in widgets like hotel/travel blocks. Search Language Management for the exact phrase before assuming the widget setting is broken.

Widget Visibility Logic based on registration type isn’t showing as an obvious option. It’s filed under contact fields, via “Show for Specific Registrants” — not a separate top-level “registration type” condition. Look there first.

The takeaway

Link Logic on custom contact fields is intentionally scoped to only connect one custom field to another — it was never built to read registration type or path, and that’s confirmed by Cvent’s own support team rather than a workaround waiting to be discovered. If what you actually need is registration-type-based behavior, Widget Visibility Logic covers text and widget display, and registration-level branching questions cover form field behavior. Match the tool to what you’re actually trying to control, and you’ll skip the trial-and-error entirely.

Why Your Link Logic Isn’t Skipping Registration Pages the Way You Set It Up in Cvent Read More »

Why Your Cvent Discount Code Is Over-Applying (And How to Fix It)

A discount code that “over-applies” usually shows up one of two ways: either it’s discounting registrants who shouldn’t qualify at all, or it’s stacking with another discount to produce a lower price than either one was supposed to give on its own. Both are almost always a scoping problem, not a bug — Cvent’s discount codes are permissive by default, meaning a code applies broadly unless you specifically narrow it. This guide walks through where that narrowing happens and the most common places people miss a restriction.

Understand the default behavior first

When you create a discount code without touching its restriction settings, it will, by default:

  • Apply to any registration type or attendee category, not just the one you had in mind
  • Remain valid for the entire registration period, not just a promotional window
  • Be usable alongside other active codes, unless you’ve explicitly set it to be exclusive

None of that is a malfunction — it’s the code doing exactly what an unrestricted code is built to do. The fix in every case below is the same idea: go back into the code’s settings and add the restriction that was missing.

Cause 1: The code isn't scoped to a specific registration type

If you created a discount meant only for, say, returning exhibitors, but didn’t restrict it to that category, it will discount new exhibitors too the moment they enter the code — whether or not they were supposed to have access to it in the first place.

The fix: Open the discount code and find the “Availability by Attendee Category” (or similarly named) field. Instead of leaving it set to all categories, select only the specific registration type(s) it should apply to.

Cause 2: No date window on the code itself

It’s common to assume a discount will “naturally” stop working once general registration closes — but if the code has no start or end date of its own, it stays valid for as long as the registration form is live, even past whatever informal deadline you communicated for the promotion.

The fix: Set an explicit start date and end date on the code, separate from the event’s overall registration deadline. If the promotion is meant to run only during an early-bird window, the code’s dates should match that window exactly, not the full registration period.

Cause 3: Volume logic was rebuilt with a second code instead of using the built-in condition

A common workaround — and a common source of stacking issues — is creating a second discount code to simulate “if 2+ people from the same group register, apply an extra discount,” rather than using Cvent’s built-in minimum-registrants condition on a single code. Two codes layered this way can combine unpredictably, especially if neither one was set to exclusive.

The fix: Delete the second/workaround code and rebuild the logic using the “minimum attendees already registered” (or equivalent) condition on the original code. This keeps the volume logic self-contained in one place instead of relying on two codes interacting correctly.

Cause 4: Multiple codes are allowed to combine

If a registrant can enter more than one valid code on the same registration and both apply, you’ll see a final price lower than either discount alone — which often looks like a bug but is actually the combinability setting doing what it was left to do.

The fix: If codes are not meant to stack, set the code (or the event’s overall discount settings, depending on your platform version) to restrict combining with other discounts. If some combinations are intentional and others aren’t, you’ll need to review each active code individually rather than relying on a single blanket setting.

Cause 5: The discount is applied to the full registration total instead of one fee item

If your event has multiple fee items (say, a base registration fee and an add-on), a percentage-based discount applied at the wrong level can end up reducing the total rather than just the specific fee it was meant to affect — which can look like it’s “discounting more than it should” even though only one restriction is technically wrong.

The fix: Check whether the discount code is scoped to a specific fee item or applied at the overall order level. If you have separate fee items set up (see the guide on registration types and pricing tiers), scope the discount to only the relevant one.

Testing checklist before you go live

  1. Register a test account that shouldn’t qualify for the code — confirm it’s rejected or simply doesn’t reduce the price.
  2. Register a test account that should qualify — confirm the discount amount matches exactly what you intended, not more.
  3. If you have more than one active code, try entering two at once on a test registration to confirm they behave as expected (either both apply intentionally, or the second is blocked).
  4. Try registering after the code’s end date to confirm it’s correctly expired.

The takeaway

A Cvent discount code that’s discounting more than intended is almost always missing one of four restrictions: a category limit, a date window, an exclusivity setting, or the right fee-item scope. Rather than troubleshooting the symptom on a live registration, open the code’s settings directly and check each of these one at a time — and always test with an account that shouldn’t qualify, not just one that should, before you open registration to real attendees.

Why Your Cvent Discount Code Is Over-Applying (And How to Fix It) Read More »

How to Set Up and Manage an Event Waitlist in Cvent (Without Overselling Capacity)

A waitlist sounds like a simple feature until you actually need it to do two things at once: stop people from registering past capacity, and automatically re-fill a spot the moment someone cancels. Get the setup wrong and you end up with one of two problems — an event that’s technically “full” but still lets people in, or a waitlist that just sits there collecting names nobody ever gets invited from.

This guide covers how to set capacity correctly at every level it applies to, how to choose between automatic and manual waitlist processing, and what to check when a waitlist isn’t converting the way it should.

Decide where capacity actually needs to be capped

Before touching any settings, be clear on what is capped — this is the step people skip, and it’s the reason a waitlist can “work” at the event level while a specific session or attendee category still oversells.

  • Event-level capacity — a hard cap on total registrations for the whole event.
  • Category-level capacity — a cap on one specific registration type (e.g., only 6 exhibitor booths, even though the overall event has no cap).
  • Session-level capacity — a cap on an individual breakout or workshop, independent of the overall event cap.

If you only set a cap at the event level, a single popular session or category can fill up while the event overall still shows availability — and attendees will be confused when they’re told a session is full but the event isn’t.

Step 1: Set the capacity limit(s)

  1. Go to your event’s Registration Settings (or Event Info, depending on your Cvent platform version) and find the Capacity or Registrant Rules section.
  2. Enter the maximum number of registrants for the level you’re capping — event, category, and/or session.
  3. Leave capacity fields blank for any level that shouldn’t be limited. A blank field is treated as unlimited, not zero — an easy mistake if you’re used to other platforms where blank means “closed.”

Step 2: Turn on waitlisting and write the messaging attendees will see

  1. Enable the Waitlist toggle for the event (and separately for any session or category that needs its own waitlist).
  2. Set the sold-out message — the text shown when someone hits a full event, category, or session. Be specific here; a generic “this event is full” message doesn’t tell people a waitlist option exists.
  3. Set the waitlist link/button text — what registrants click to join. “Join the Waitlist” performs better than vague phrasing like “Learn More,” since it sets a clear expectation.

Step 3: Choose automatic or manual waitlist processing

This is the setting that determines whether your waitlist actually does the work for you.

  • Automatic processing — the moment a spot opens (someone cancels or is removed), the system automatically registers the next person on the waitlist, in the order they joined, and sends them a confirmation. Best for high-volume events where you don’t have time to manage this manually.
  • Manual processing — an admin has to review the waitlist and invite the next person, who then has to confirm before the spot is locked in. Best when you need to control exactly who fills a spot (e.g., prioritizing by attendee category, sponsor tier, or approval status) rather than strictly by wait time.

If you choose manual, make sure someone on your team actually owns checking the waitlist regularly — a manual waitlist with no one monitoring it is functionally the same as having no waitlist at all.

Step 4: Set up the emails that go with it

A waitlist is only as good as the communication around it. At minimum, confirm these are turned on and correctly worded:

  • Waitlist confirmation email — sent when someone joins the waitlist, so they know they’re on it (not registered).
  • Spot-available / invitation email — sent when a spot opens, whether that’s an automatic confirmation or a manual “you’re invited to register” prompt.
  • Cancellation confirmation email — sent to the person who cancels, which is what triggers the waitlist to check for the next name.

If you’re using manual processing, the invitation email should include a clear deadline to respond, and your process should define what happens if that deadline passes (move to the next person automatically, or hold the spot open).

Step 5: Test the full cycle before you rely on its that go with it

Don’t just test that the waitlist accepts someone — test that it actually fills a spot.

  1. Set a temporary low capacity (e.g., 2) on a test category or session.
  2. Register two test accounts to fill it, then register a third — confirm they’re offered the waitlist, not blocked outright.
  3. Cancel one of the first two registrations.
  4. Confirm the third account is automatically registered (if automatic) or receives an invitation (if manual), and that the correct emails fire at each step.
  5. Reset the capacity back to its real number once testing is confirmed working.

Common issues and how to fix them

People are still registering after the event shows “full.” Check whether capacity is set at the level you think it is. A cap on the event overall won’t stop registrations to an uncapped category or session within it.

The waitlist isn’t moving anyone up after a cancellation. Confirm the cancellation is going through the system’s cancel workflow, not just a manual deletion of the record — a deleted registration doesn’t always trigger the same waitlist check that a proper cancellation does.

Waitlisted people never hear anything. Check that the waitlist-related email triggers are actually turned on — they’re separate from your standard registration confirmation emails and are easy to leave off during initial setup.

A category or session is oversold despite a waitlist being “on.” Waitlisting has to be enabled at the same level as the capacity that’s being hit — enabling it only at the event level won’t protect a specific session or category.

The takeaway

A working Cvent waitlist comes down to matching three things at the same level — capacity, waitlist enablement, and the emails that drive it — rather than assuming an event-level setting covers everything underneath it. Set the cap where the real constraint is (event, category, or session), pick automatic or manual based on how much control you need over who fills a spot, and run a full cancel-to-refill test before you trust it on a live event.

How to Set Up and Manage an Event Waitlist in Cvent (Without Overselling Capacity) Read More »

How to Set Up Multiple Registration Types with Different Pricing Tiers in Cvent

If you’re running an event where different groups of people need to pay different fees — say, a trade show where new exhibitors pay $750 for a booth and returning exhibitors pay a lower renewal rate — Cvent can absolutely handle it. But because the setup touches three different areas of the platform (registration types, pricing, and registration paths), it’s easy to configure just one piece and end up with pricing that doesn’t apply correctly, or a registration type that attendees can’t even select.

This guide walks through the full setup, in order, and covers the mistakes that most commonly break it.

Before you start: know the difference between three settings

People often use “registration type,” “category,” and “path” interchangeably — but in Cvent they control different things, and mixing them up is the #1 reason pricing tiers don’t work as expected.

  • Registration Type / Attendee Category — defines who someone is (e.g., New Exhibitor, Returning Exhibitor, Member, Non-Member). This is the label attached to their record.
  • Fees & Pricing — defines how much each registration type pays, and can include early-bird windows, deadlines, or tiered pricing.
  • Registration Path — defines what registration flow a person is routed through based on how they access the site (a link, an invitation, or a public registration page). Paths are what let you show different fees, questions, or steps to different audiences.

If any one of these three isn’t configured, the other two won’t behave the way you expect — the most common symptom is a fee that either doesn’t apply, applies to everyone, or a registration type attendees can’t select at all.

Step 1: Create your registration types

  1. Open your event and go to Registration → Registration Types (or General → Registration Types, depending on your Cvent platform version).
  2. Click Add Registration Type for each audience you need — for a trade show example, you’d create:
    • New Exhibitor
    • Returning Exhibitor
  3. Give each one a clear, attendee-facing name. Avoid internal shorthand (“Ret. Exh.” confuses registrants) — this label often appears on the registration form itself.
  4. Set the status of each type to Active only once you’re ready for people to register under it. Leaving unused types active is a common source of registration confusion later.

Step 2: Set up the fees for each type

  1. Go to Fees & Payment (sometimes labeled Pricing depending on your product).
  2. Create a separate fee item for each registration type — don’t try to reuse one fee item and discount it down for the second group. Separate fee items give you cleaner reporting and avoid the discount-code conflicts covered below.
  3. For each fee, set:
    • Amount (e.g., $750 for New Exhibitor, $500 for Returning Exhibitor)
    • Availability window, if the fee should only be offered during a certain registration period
    • Attendee category / registration type it applies to — this link is what actually ties the price to the right group. It’s the step most often skipped.
  4. If you’re also capping how many booths or seats are available per category, set the capacity for that fee item here too, not just at the overall event level. Capacity set only at the event level won’t stop one group from using up all the spots meant for another.

Step 3: Build (or check) your registration paths

  • If exhibitors are registering through a single public link, you’ll typically need a path with a selection step — a screen where the registrant picks “New Exhibitor” or “Returning Exhibitor” before seeing pricing.
  • If you already know who’s who (e.g., you have a list of last year’s exhibitors), you can instead use an invitation list tied to a specific registration type, so returning exhibitors land directly on their pricing without having to self-select. This also reduces the risk of someone picking the cheaper option they don’t actually qualify for.
  • Test each path in preview mode as a registrant would see it — not just from the admin view — before sending invitations. Admin previews sometimes show all types regardless of path restrictions, which can mask a setup error.

    Registration paths control who sees which registration type in the first place.

  •  

Step 4: Apply discount codes carefully (if you're using them on top of tiered pricing)

This is where a lot of setups break. If you’re layering a discount code on top of an already-tiered fee structure (for example, “2+ booths get 10% off,” in addition to the New/Returning pricing), go to Discount Codes and scope the code narrowly:

  • Restrict it to the specific registration type(s) it should apply to — don’t leave it available to all categories by default.
  • If the discount should only kick in once a minimum number of registrants are already in a group, use the “minimum attendees already registered” condition rather than trying to recreate that logic with a second discount code layered on the first.
  • Set a clear start and end date on the code itself, separate from your general registration deadline, if it’s meant to apply only during a promotional window.

Discount codes that aren’t scoped tightly enough are the most common cause of a fee being “over-applied” — where a discount meant for one small group ends up reducing the price for everyone who registers.

Step 5: Test with real accounts, not just the admin preview

Before you launch:

  1. Register a test account under each registration type.
  2. Confirm the correct fee appears, not a default or blended price.
  3. Confirm any discount code behaves as scoped (apply it to a test account that shouldn’t qualify and make sure it’s rejected).
  4. Pull a quick registration report and check that the registration type field is populating correctly for each test record — this is what you’ll rely on later for reporting and badge printing.

Common issues and how to fix them

A registrant sees the wrong price. Check whether the fee item is actually linked to their registration type (Step 2) — this link is separate from simply naming the fee similarly.

A discount code is discounting more than it should. Re-check the code’s category and date restrictions. A code with no restrictions applies to every registration type and every date by default.

An attendee can’t find their registration type on the form. This is almost always a registration path issue — either the type wasn’t added to the path they’re using, or the path is routing them somewhere else entirely.

Reports show the wrong category for a group of registrants. If people registered through a shared link rather than an invitation list, confirm the selection step in the path was actually presented — some path configurations default silently to one category if the selector isn’t required.

The takeaway

Multiple pricing tiers in Cvent aren’t complicated once you treat registration types, fees, and paths as three separate, connected settings rather than one combined step. Set them up in that order, scope any discount codes tightly, and always test as a registrant before you open registration — it’ll save you from having to manually correct pricing on live registrations later.

How to Set Up Multiple Registration Types with Different Pricing Tiers in Cvent Read More »

Got an event approaching soon

15987
AttendeeGain Logo
Select an Option
Scroll to Top