How to Merge Duplicate Contacts and Manage Multiple Emails in Cvent
Duplicate contacts are the bane of clean event reporting. Attendees frequently register for one event using their personal Gmail account, and then register for next year’s event using their corporate email. This creates two entirely separate contact profiles in your Cvent Address Book, splitting their attendance history and muddying your data.
Cvent does not allow a single contact to have multiple primary email addresses. To combine their history, you must merge the duplicate records. Here is exactly how to do it in the modern Cvent interface without losing any past event data.
1. Locate and Select the Duplicates
Contact merging must be done at the global account level, not from inside a specific event dashboard.
How to Set It Up:
From the top global navigation bar, click on Contacts, then select Contacts from the dropdown menu.
Use the search bar to find the attendee’s name.
Review the results to confirm they are indeed the same person (check their company name or title if they share a common name).
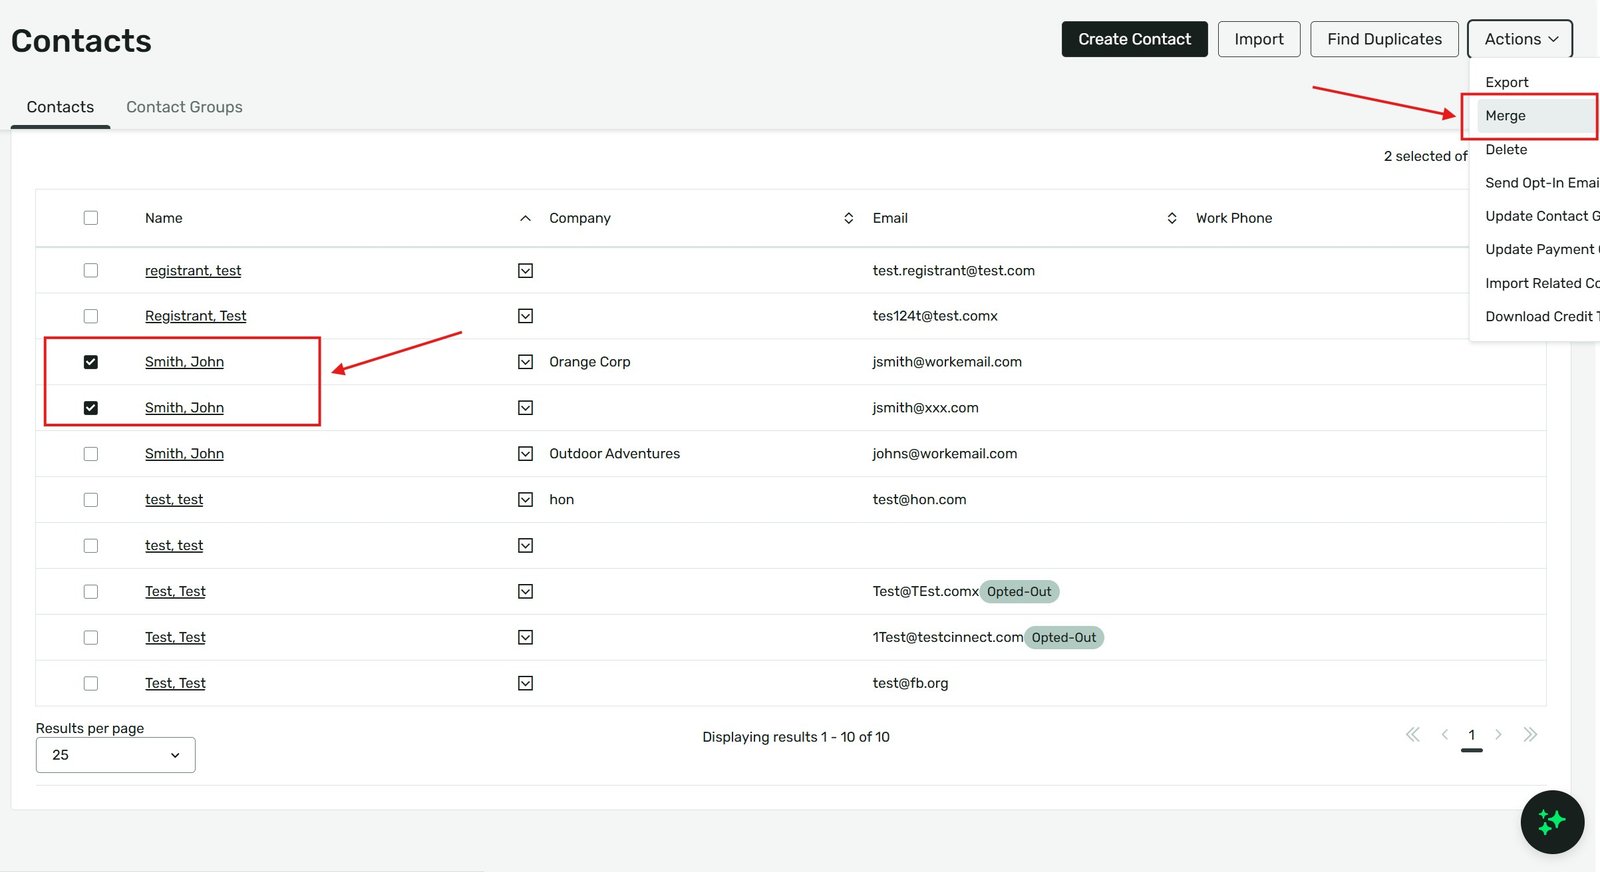
Check the boxes on the left side of the names for the records you want to combine.
Note: Cvent only allows you to merge a maximum of 3 contacts at a single time. If an attendee has 4 or more duplicates, you will need to do this process in batches.
2. Initiate the Merge
Once your duplicates are selected, you can trigger the merge wizard.
How to Set It Up:
With the checkboxes selected, click the Actions dropdown menu located on the right side above the data table.
Select Merge from the dropdown list.
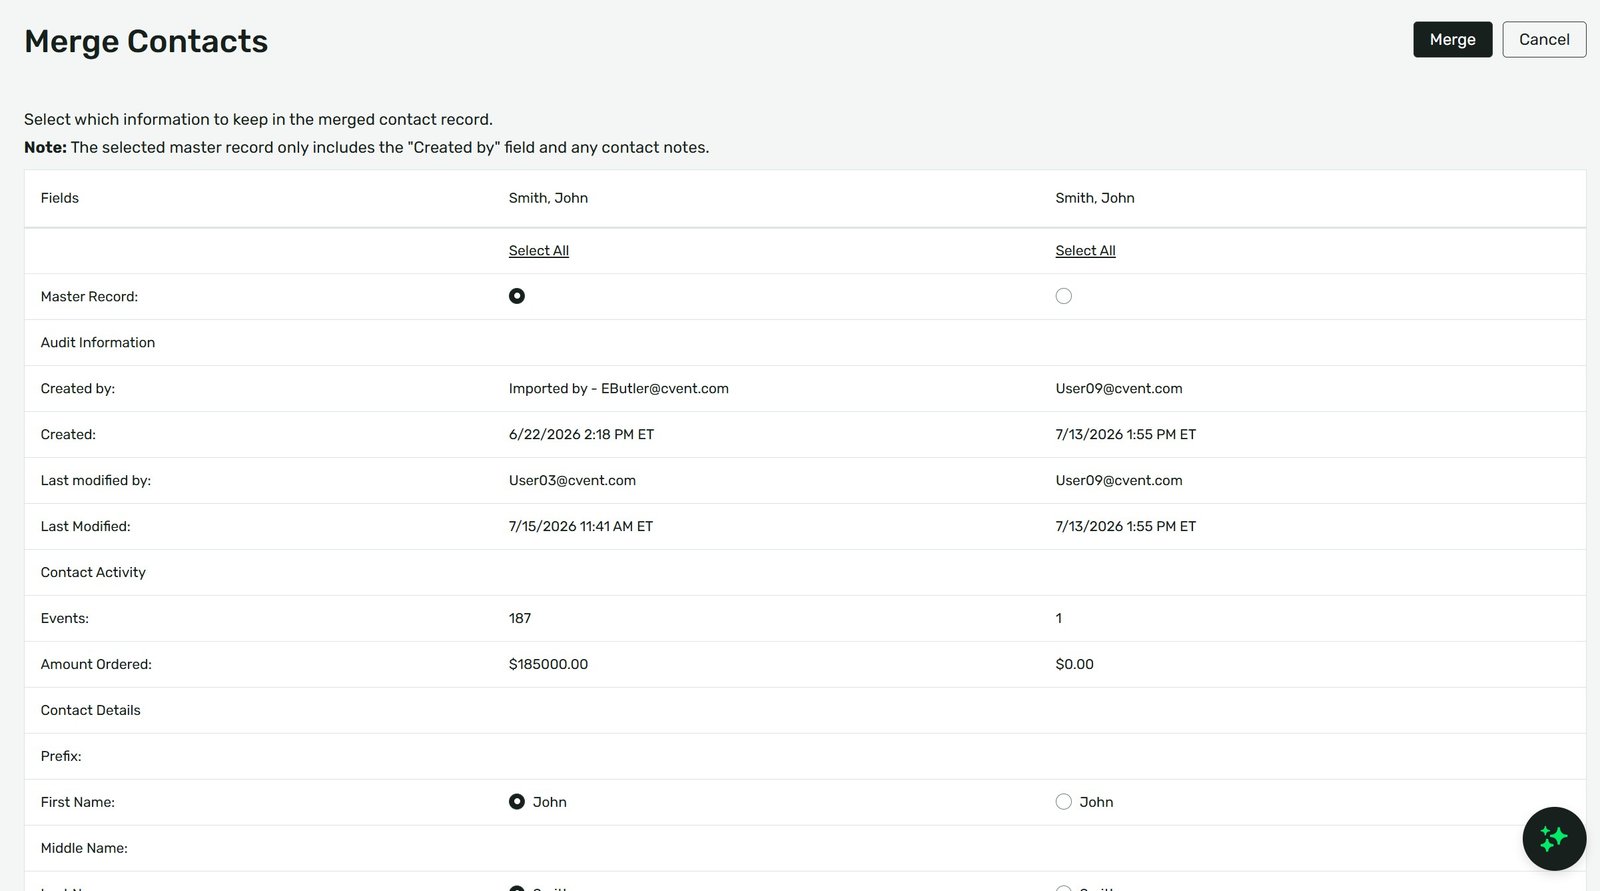
This will open the Merge Contacts comparison screen.
3. Choose the "Master" Record
When you merge contacts, Cvent takes all the historical event data (invitations, registrations, survey answers) from the merged profiles and dumps it into one primary profile. You must tell Cvent which profile gets to survive.
How to Set It Up:
On the Merge Contacts screen, you will see the selected profiles side-by-side.
Review the data in each column. Determine which email address and job title is the most current and accurate.
Click the radio button at the top of the column for the profile you want to keep as the Master Record.
Click Merge.
Warning: This action is permanent and cannot be undone. The non-master records will be permanently deleted, though their event history will successfully transfer to the Master Record.
4. Managing the Alternate Email
Because the Master Record can only hold one primary email, the alternate email address from the deleted duplicate is now gone. If the attendee still wants to receive confirmations at both addresses, you must add it manually.
How to Set It Up:
Open your newly merged Master Record.
Click Edit.
Scroll down to the CC Email Address field.
Type in the secondary email address (e.g., their personal Gmail) that was lost during the merge.
Click Save. Now, automated event emails will route to both their corporate and personal inboxes.
Agency Pro-Tip: Stop duplicates before they happen by optimizing your event’s Contact Match settings. Inside your event, go to Registration > Registration Process, click the gear icon for your path, and review the Contact Match rules. Set it so that if a user types in a matching First Name, Last Name, and Email, Cvent automatically ties them to their existing Address Book record instead of spawning a new one.
Agency Pro-Tip: When selecting a Master Record, always establish an internal agency rule for consistency. For corporate events, best practice is to always select the profile tied to their active corporate email address as the Master, rather than their personal Yahoo or Gmail account.
Key Takeaways
Global level only: You must merge contacts from the global Contacts tab, not from within a specific event.
Rule of 3: You can only merge up to three contact records at a time.
Select the Master carefully: The Master Record’s core profile data (Name, Primary Email, Company) is the only data that survives the merge, though all event history is retained.
Use CC for multiple emails: Cvent profiles only support one primary email. Put their secondary email in the CC field if they need notifications sent to both.
How to Merge Duplicate Contacts and Manage Multiple Emails in Cvent Read More »